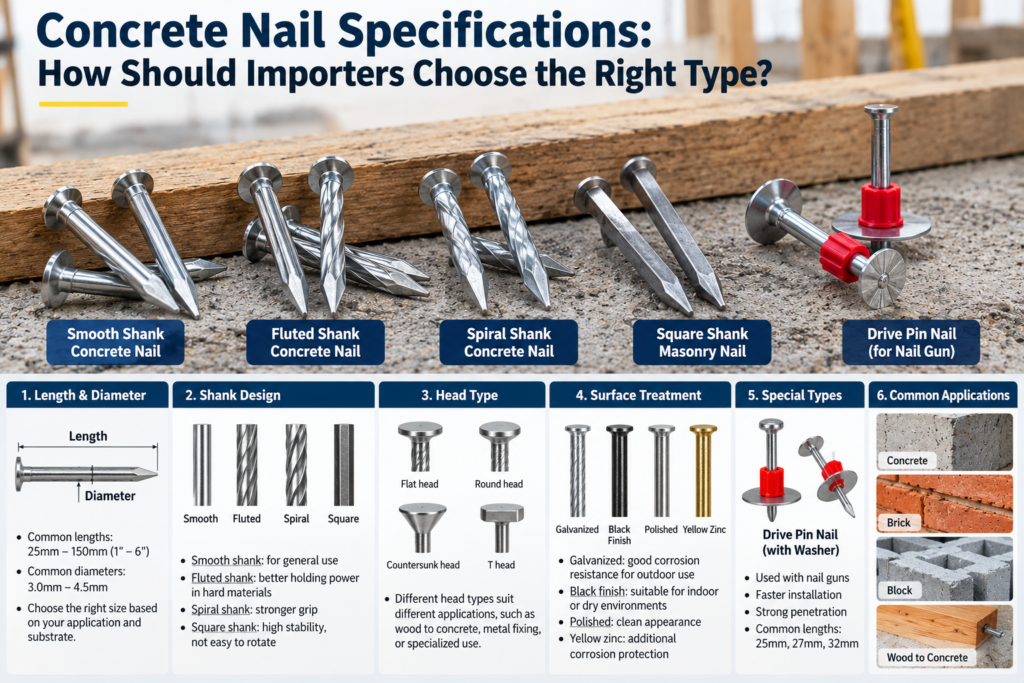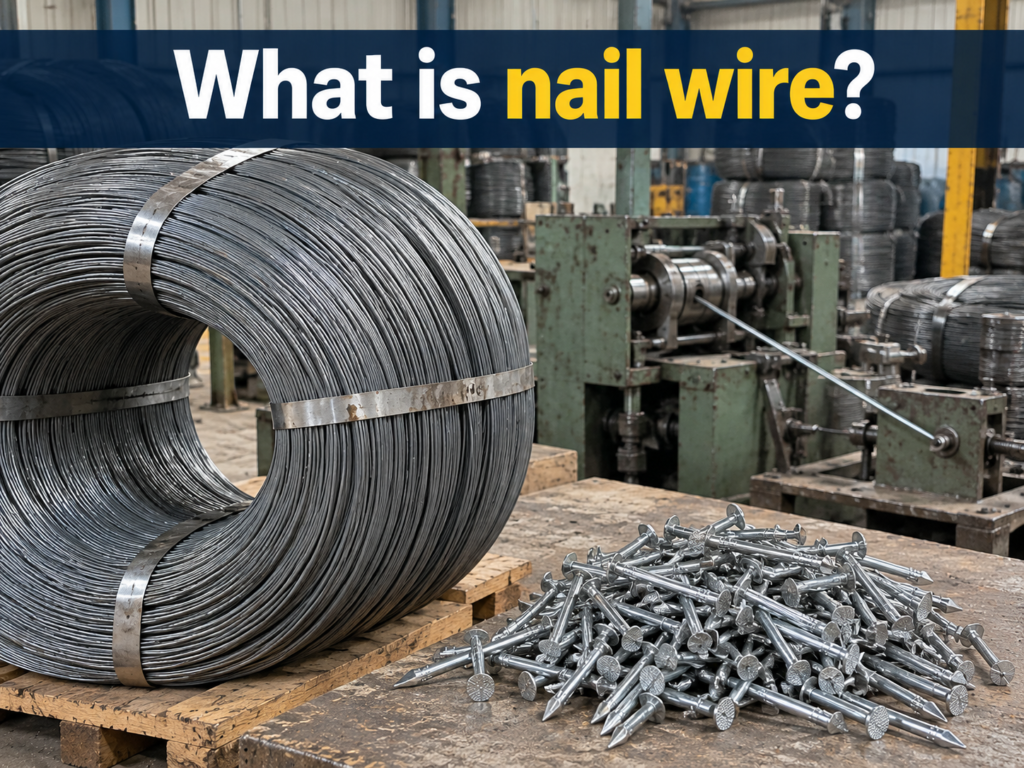
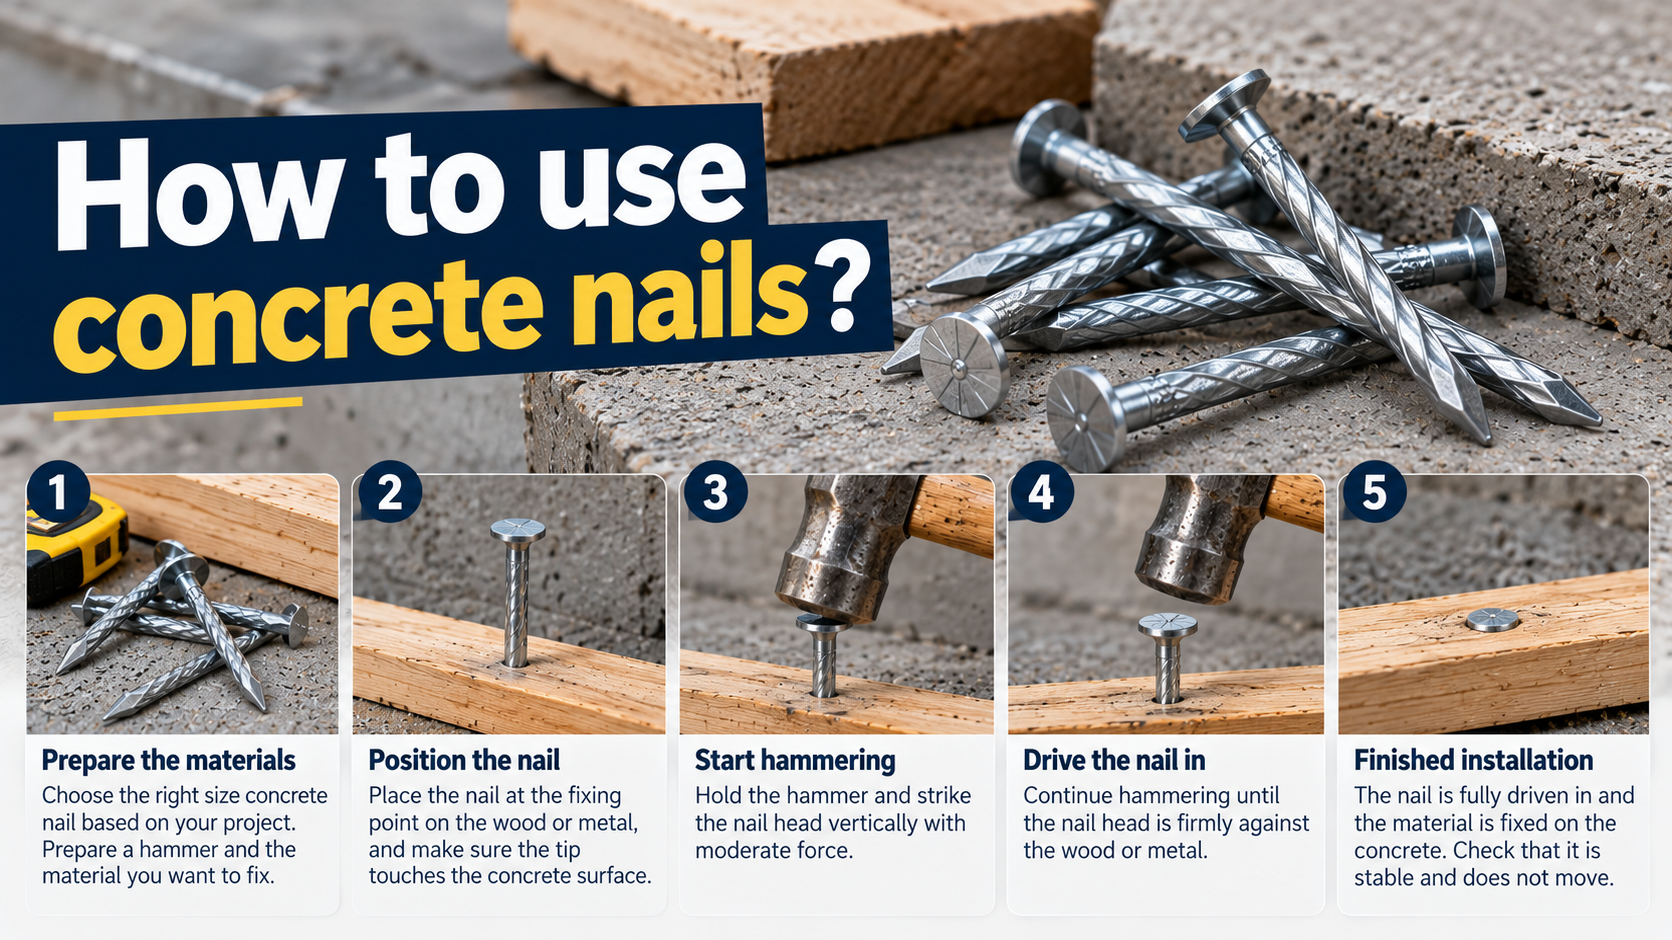
Choosing concrete nails feels simple until you see a contractor return an entire order because the nails bent when hammered, cracked the concrete, or simply wouldn’t penetrate at all. I’ve processed dozens of these complaints at our factory, and they almost always trace back to one problem: customers bought the wrong specification for their installation method. The actual "how to use" question isn’t about hammering technique—it’s about matching nail type, diameter, and head style to your material, available tools, and job requirements before you even open the box.
If you’re using a standard hammer without pre-drilling pilot holes, concrete nails only work reliably in soft to medium concrete and lightweight masonry blocks. For dense, aged concrete or hard masonry, you need either a powder-actuated tool that fires nails with explosive force, or you must pre-drill holes that match the nail’s shank diameter. The critical decision is tool-nail pairing: powder-actuated nails come with special hardened points and require specific drive tools, while standard fluted concrete nails need hammer installation in compatible materials or pre-drilling in hard substrates.
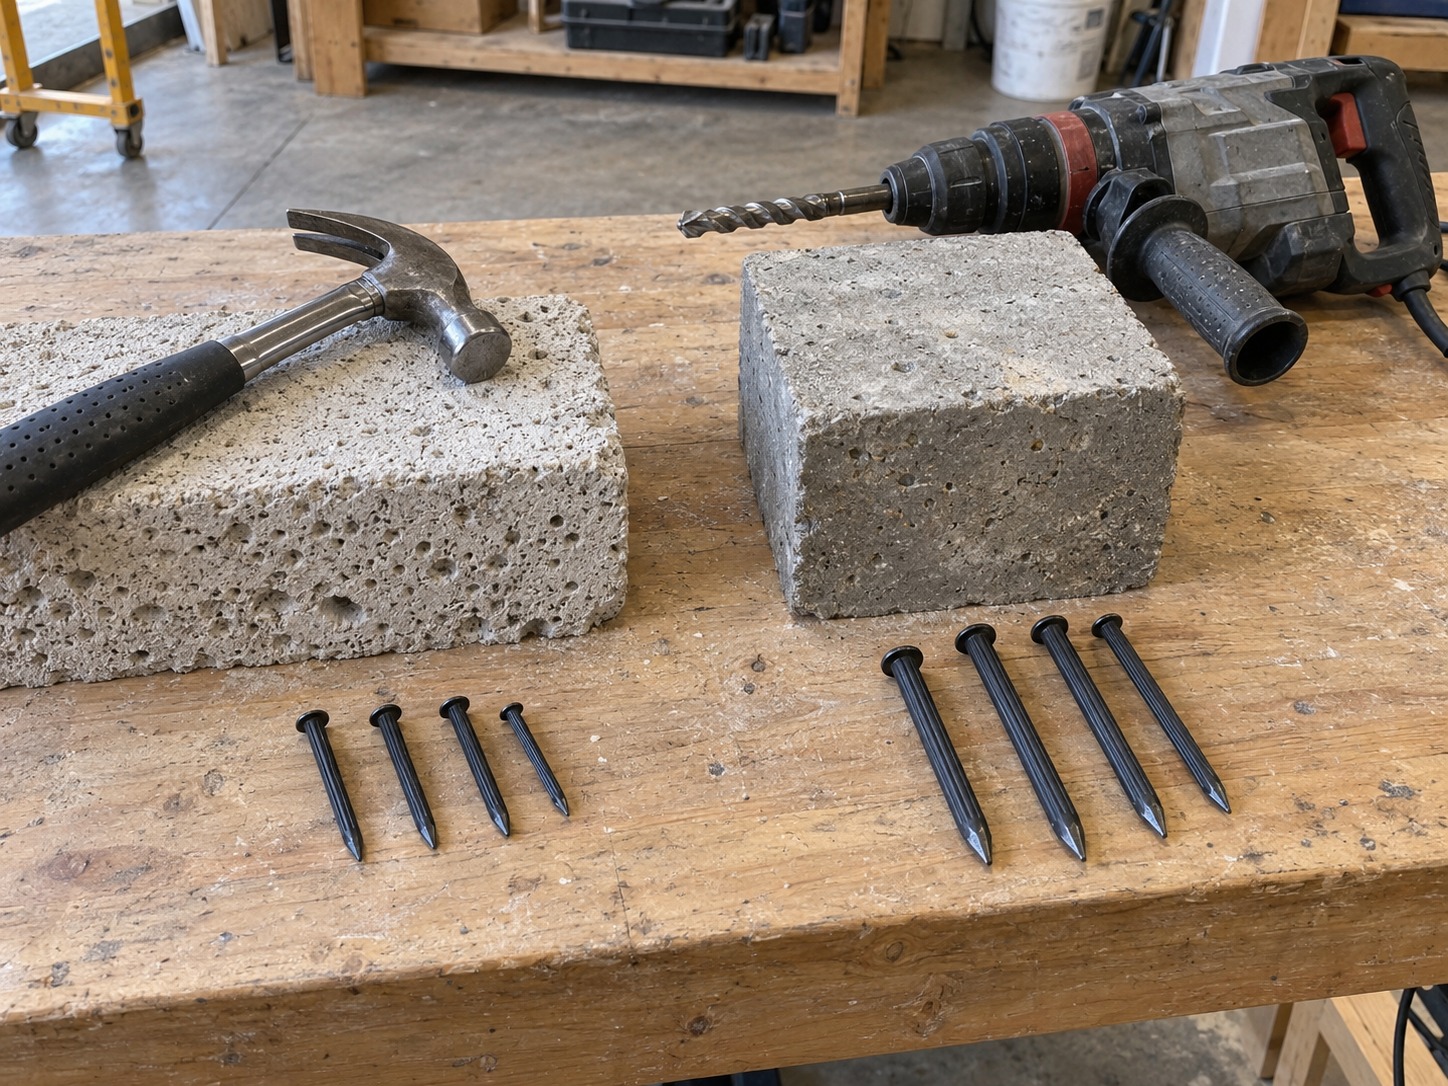
Most of the complaints I resolve aren’t about defective products—they’re about wrong specification choices that seemed trivial during ordering but became expensive mistakes on site. Let me show you how to avoid that by matching your nail selection to your actual installation conditions.
What tools do you actually need to install concrete nails?
I see this pattern in nearly every customer inquiry from distributors in our target markets: they assume concrete nails work like wood nails—buy them, hammer them in, done. Then their customers call back frustrated because the nails bent at the tip or wouldn’t penetrate deeper than 15mm.
The fundamental question isn’t "what’s the best tool" but "what tool do you already have, and which nail specification works with it?"
Standard hammer installation
For regular hammer installation without pre-drilling, you need three conditions to align: soft to medium concrete (not fully cured or mixed for moderate strength)1, fluted shank concrete nails with hardened steel construction, and direct striking with a 500g-800g hammer2 using controlled, square strikes.
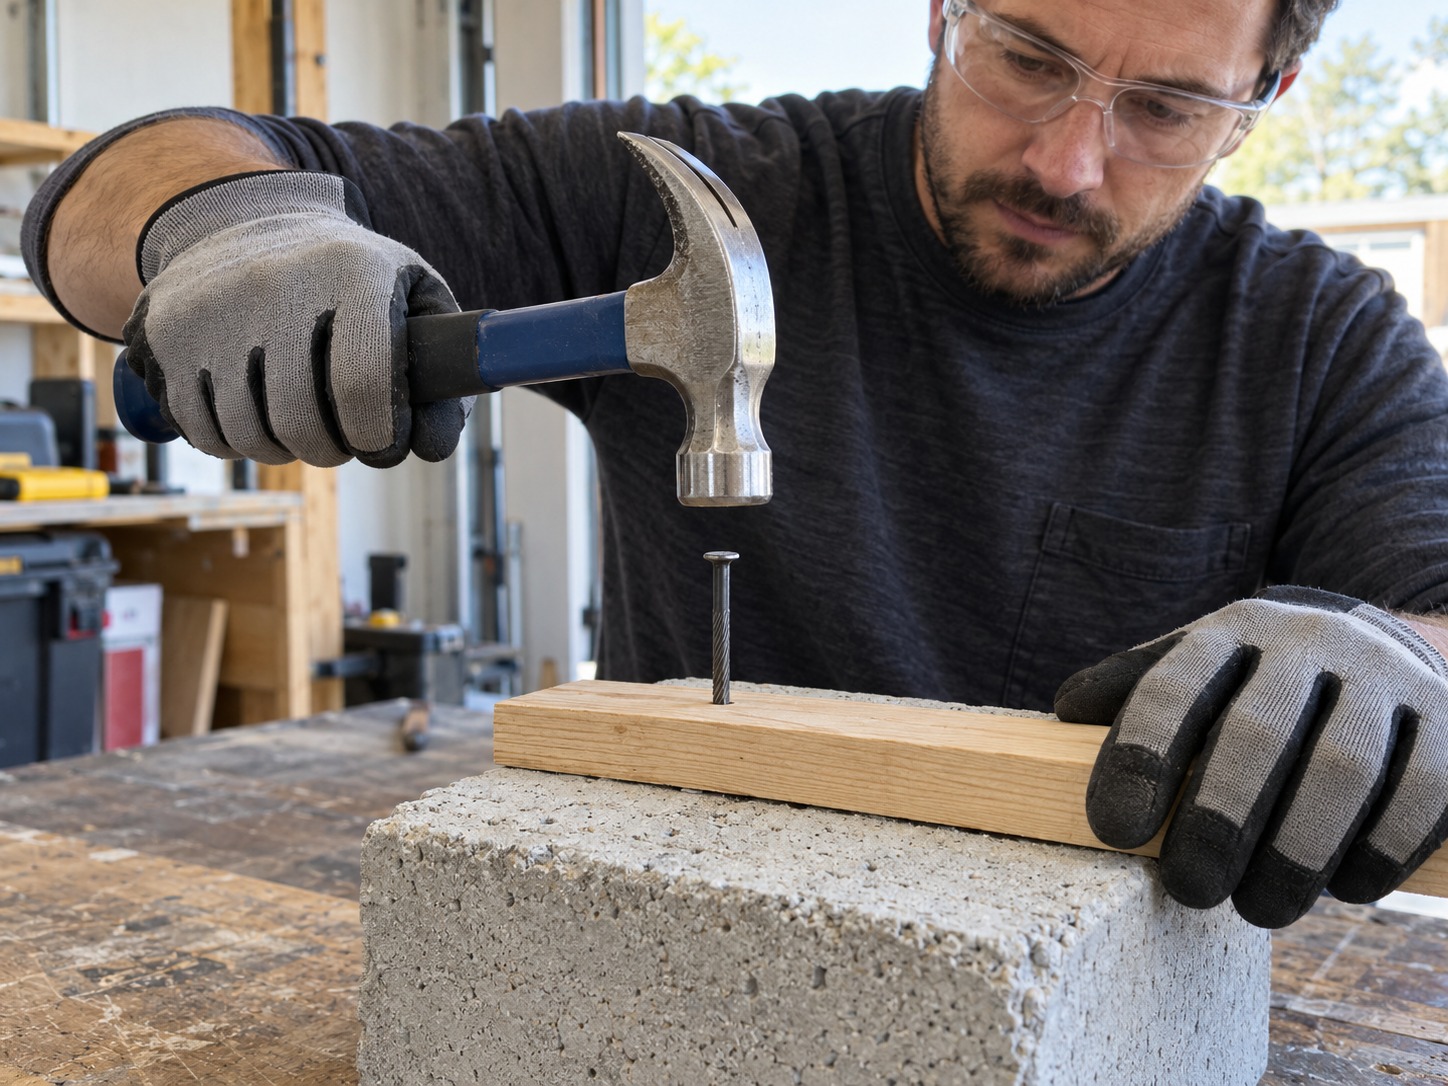
Here’s what actually happens during hammer installation:
The nail’s hardened point must fracture the aggregate particles in the concrete rather than bend against them. Fluted shanks create friction channels that grip the concrete3 as the nail penetrates. But if the concrete is too hard—typically aged concrete over 6 months old, high-strength mixes above 30MPa4, or dense natural stone—the nail tip deforms before achieving adequate penetration depth.
When hammering works:
- Concrete blocks and lightweight masonry units
- Fresh concrete (within 3 months of curing) with standard strength ratings
- Interior wall installations where concrete wasn’t designed for structural load
- Fixing wooden battens, cable clips, or lightweight fixtures
When hammering fails:
- Foundation concrete and structural slabs designed for high compression
- Exterior concrete surfaces exposed to weather hardening
- Dense clay brick or natural stone (common misapplication)
- Any scenario requiring penetration depth exceeding 35mm
I’ve noticed customers in Southeast Asia and parts of Africa order large quantities expecting universal hammer installation, then face returns when their buyers attempt installation in old building foundations. The nail didn’t fail—the specification choice was wrong for the substrate.
Pre-drilling method
Pre-drilling eliminates the penetration force problem but introduces precision requirements that small contractors often underestimate.
Pre-drilling requires a masonry drill bit matching the nail’s shank diameter minus 0.5-1mm (so a 3.4mm nail needs a 2.5-3mm pilot hole), drilling depth equal to nail length plus 5mm for debris clearance5, and immediate installation before dust accumulation reduces friction grip.
The logic here inverts the installation sequence: instead of forcing the nail through the material, you create a sized channel that provides friction grip without requiring hardness penetration. But I’ve seen customers drill holes too large (thinking easier installation means better holding power) and then complain the nail pulls out under load.
Critical drilling parameters:
- Bit size: Always smaller than nail shank—friction comes from material compression, not clearance fit
- Depth accuracy: Shallow holes cause nail tips to hit solid material and bend; excessive depth reduces holding power
- Dust removal: Compressed air or vacuum before insertion—dust cushioning kills friction grip
Pre-drilling works for all concrete hardness levels and most masonry types, but it triples installation time and requires access to rotary hammer drills with masonry bits. For large-scale projects, this cost difference matters.
Powder-actuated tools
I don’t handle powder-actuated nail sales directly, but I mention this because customers often confuse standard concrete nails with powder-driven fasteners. They’re completely different systems.
Powder-actuated tools use explosive charges to drive specially-hardened nails at high velocity. These tools and their compatible nails require different specifications, safety certifications, and handling procedures. The nails aren’t interchangeable—standard concrete nails fired from powder tools will shatter or cause tool malfunction.
If customers ask about driving nails into steel structural beams, concrete over 40MPa strength, or high-volume installations, I redirect them to powder-actuated system suppliers. That’s not our product category, and claiming otherwise would create serious safety liability.
What specifications matter for different materials?
This is where ordering mistakes happen most frequently. Customers see "concrete nail" and assume one specification works everywhere concrete exists. Then they hit application mismatches.
The critical specification trio is nail diameter (determines load capacity and bending resistance), length (must achieve minimum 25mm embedment depth6 after penetrating attached material), and head style (countersunk for flush finish, flat for clamping force, or checkered for slip resistance).
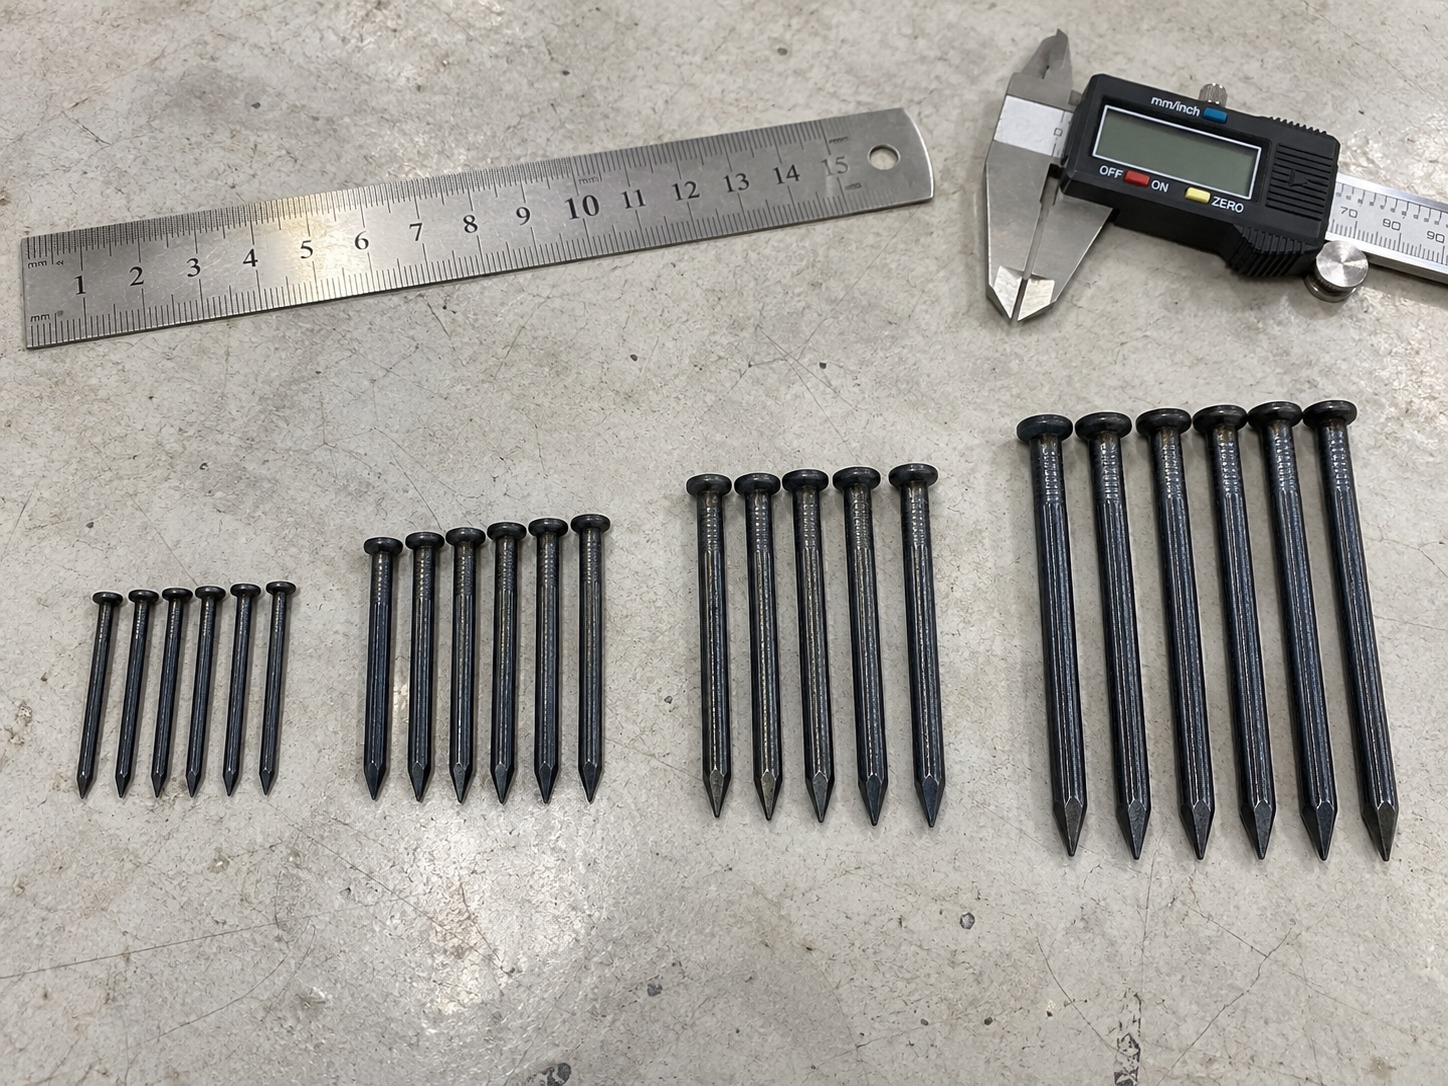
Let me break down the selection logic I use when processing customer inquiries:
Matching diameter to material hardness
Our standard concrete nail range runs from 2.5mm to 4.5mm diameter. The diameter choice isn’t about the weight you’re hanging—it’s about whether the nail can penetrate your specific material without bending.
Small diameter (2.5-3.0mm):
- Lightweight masonry blocks and aerated concrete
- Interior partition walls with soft aggregate mixes
- Installing cable clips, thin battens, or non-structural fixtures
- Advantage: easier hammering with less pre-drilling force
- Limitation: bends easily in hard concrete, low load capacity
Medium diameter (3.4-3.8mm):
- Standard construction concrete and solid brick
- Wooden frame attachment to masonry walls
- Moderate-weight shelving and fixture mounting
- Balance point: adequate strength for most applications without requiring excessive striking force
Large diameter (4.0-4.5mm):
- Dense concrete, natural stone, and high-strength masonry
- Structural fastening applications with significant shear loads
- Exterior installations exposed to weathering stress
- Requirement: usually needs pre-drilling in aged or hard concrete
I’ve processed complaints where customers ordered 2.5mm nails for attaching wooden frames to foundation walls—the nails bent during hammering because the diameter couldn’t withstand the striking force needed to penetrate dense concrete. The correct specification was 3.8mm with pre-drilling.
Length calculation for embedment depth
This seems obvious but generates frequent specification errors. Length isn’t just "long enough to go through"—you need adequate embedment depth in the base material for friction grip.
Calculation formula:
Required nail length = Material thickness being fastened + Minimum 25mm embedment + 3-5mm penetration allowance
Example: Fastening 20mm wooden batten to concrete wall
- Batten thickness: 20mm
- Minimum embedment: 25mm
- Penetration allowance: 5mm
- Minimum nail length: 50mm
Common mistake I see: customers order 40mm nails for this application, achieving only 15-20mm actual embedment after accounting for material thickness. When the batten pulls away under load, they blame nail quality rather than insufficient embedment depth.
For load-bearing applications, professional evaluation may recommend 30-35mm embedment depth. As a supplier, I can explain the specification logic, but site-specific load calculations require qualified engineering assessment.
Head style selection for fastening requirements
We manufacture three standard head configurations, each designed for specific attachment scenarios:
Flat head (6-8mm diameter):
- Maximum clamping pressure for securing thin materials
- Visible installation where aesthetic finish isn’t critical
- Applications: electrical conduit clips, cable trays, temporary formwork
- Advantage: largest bearing surface prevents pull-through
Countersunk head:
- Flush finish installation where protruding heads create hazards
- Attaching thin sheet materials or trim work
- Woodworking applications requiring subsequent surface finishing
- Limitation: reduced clamping pressure compared to flat head
Checkered head:
- Slip-resistant fastening for materials prone to lateral movement
- Securing wooden battens in vibration-prone environments
- Applications where grip matters more than aesthetic finish
- Regional preference: popular in Middle East construction methods
I don’t see customers confuse head styles often, but when they do, it’s usually ordering countersunk heads for thick material clamping (where flat heads would provide better holding power) or flat heads for finish carpentry (where visible nail heads ruin the aesthetic).
Which base materials actually work with concrete nails?
This question drives more specification failures than any other factor. The name "concrete nail" creates an assumption that they work for all hard construction materials. They don’t.
Concrete nails are engineered for concrete, cement mortar, and fired clay masonry products. They fail or cause material damage when applied to natural stone, composite materials with fiber reinforcement, or extremely hard ceramic tile substrates.
Materials where concrete nails work
Let me list the compatible base materials I confidently recommend based on years of successful customer applications:
Poured concrete and concrete blocks:
- Standard strength concrete (20-35MPa)7 up to 12 months old
- Lightweight concrete blocks and aerated concrete panels
- Concrete paving slabs with standard aggregate mixes
- Installation note: pre-drill for concrete exceeding 30MPa or aged beyond 6 months
Cement mortar and render:
- Interior wall plastering with cement-based compounds
- Exterior render systems on masonry backing
- Mortar joints in brick or block construction (if joint thickness allows adequate embedment)
- Limitation: mortar-only grip is weaker than concrete—use larger diameter nails
Fired clay masonry:
- Solid clay bricks (not engineering bricks, which are too hard)
- Clay building blocks and partition units
- Terracotta tiles when backed by solid substrate
- Regional note: brick hardness varies significantly—Southeast Asian soft bricks accept nails easily, while high-fired European engineering bricks may require pre-drilling
Materials where concrete nails fail
I’ve handled returns and complaints from every one of these misapplications. The nail didn’t break manufacturing standards—it was used on incompatible material:
Natural stone:
Granite, marble, and dense limestone are harder than the nail material. The nail tip mushrooms on impact or shatters the stone surface. Even pre-drilling doesn’t solve this—you need specialized stone anchors with expansion mechanisms.
Composite materials:
Fiber cement boards, reinforced concrete panels with synthetic fibers, and modern composite cladding systems don’t provide the aggregate-friction structure that concrete nails rely on. The nail penetrates but pulls out easily because there’s no mechanical grip.
High-strength or specialty concrete:
Engineering concrete above 40MPa8, glass-reinforced concrete, and polymer-modified concrete exceed the hardness threshold where standard concrete nails function. These applications require powder-actuated fasteners or chemical anchoring systems.
Hollow or cellular materials:
Concrete nails need solid substrate for friction grip. Hollow concrete blocks, cavity wall construction, and cellular concrete panels allow the nail to penetrate but provide no holding power. Use specialized cavity fixings instead.
I can’t count how many inquiries I’ve received asking if concrete nails work for granite countertops or fiber cement siding. The honest answer is no—and recommending the wrong fastener type creates safety liability for everyone in the supply chain.
How do installation conditions affect nail selection?
Here’s what I’ve learned from processing customer feedback: the same nail specification performs completely differently depending on where and how it’s installed. Customers ordering for indoor residential work need different specs than those supplying commercial exterior projects.
Environmental factors—moisture exposure, temperature cycling, and chemical contact—determine whether standard steel nails will corrode before the fastened material deteriorates, making material finish selection critical even though most customers focus only on mechanical specifications.
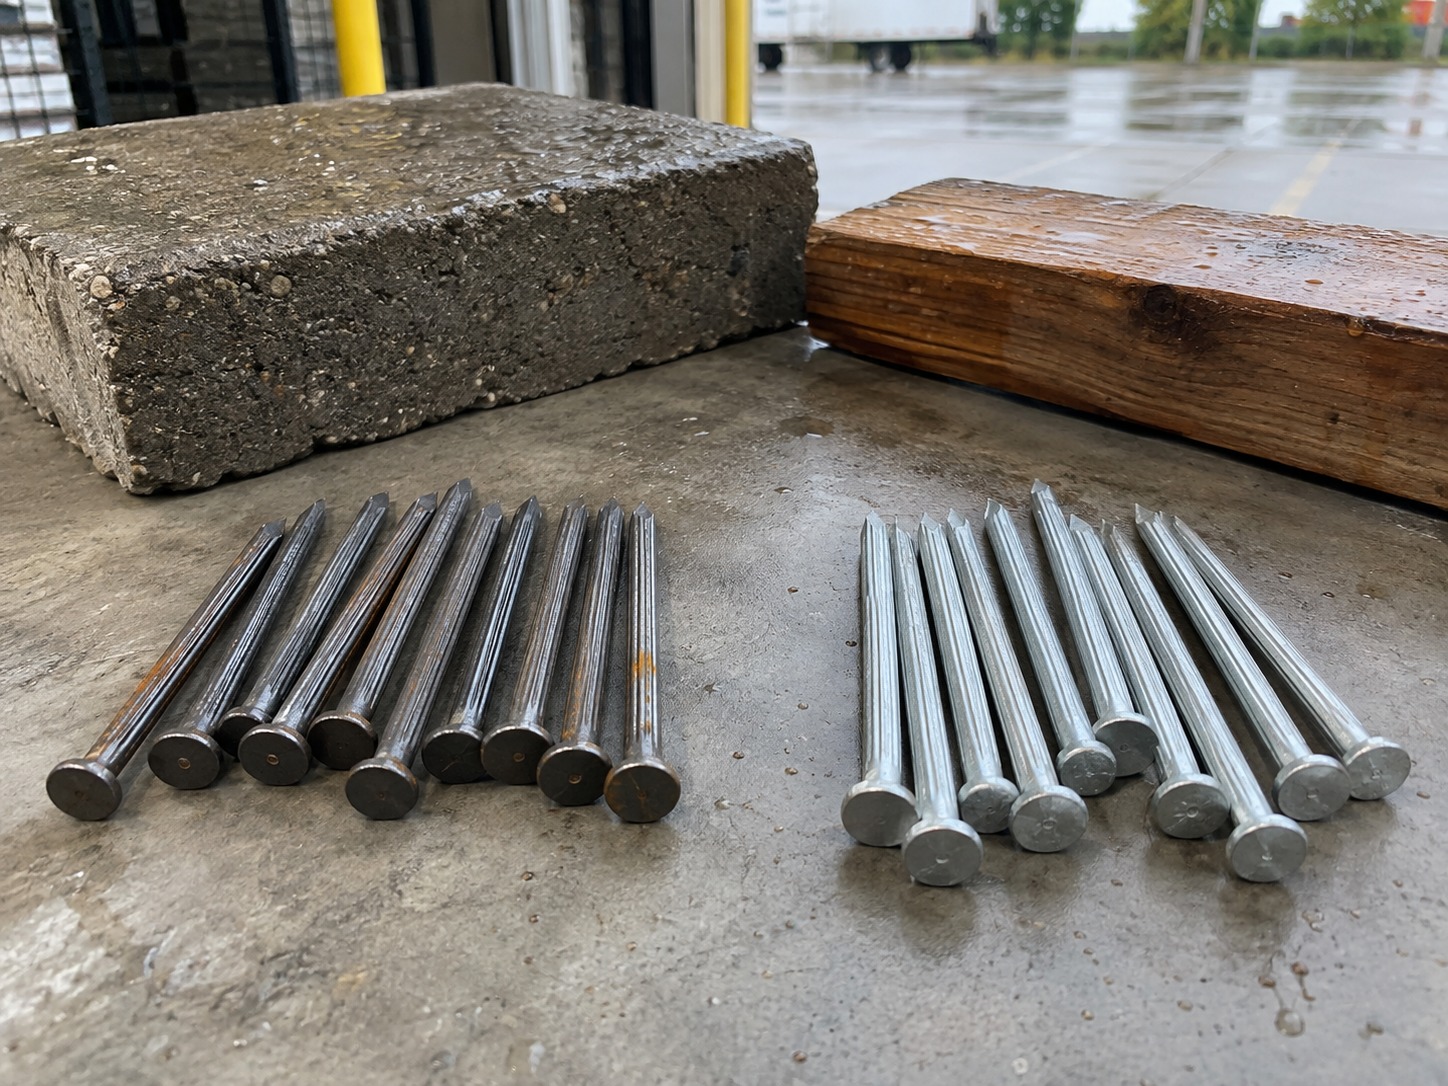
Interior versus exterior installation
Our standard product line includes black steel nails (lowest cost, no corrosion protection) and galvanized nails (zinc coating for moisture resistance)9. The selection should match the exposure environment, not just the budget.
Interior applications (dry environment):
Black steel concrete nails provide adequate service life because moisture exposure is minimal. I recommend them for:
- Interior partition wall fastening
- Indoor cable management and fixture mounting
- Wooden framing attached to interior masonry walls
- Cost advantage: 15-25% lower than galvanized equivalents
Exterior applications (weather exposure):
Galvanized concrete nails are mandatory unless you’re planning to replace fasteners within 2-3 years. Critical applications include:
- Outdoor wooden structures attached to concrete foundations
- Exterior cladding systems and rain screen mounting
- Garden and landscaping construction
- Coastal regions or high-humidity climates
I’ve seen distributors in Southeast Asian markets order black steel nails for outdoor pergola construction to save cost, then face warranty claims within 18 months when rust staining appears10 and nails lose holding strength. The specification choice seemed rational at ordering time but failed under actual site conditions.
Load-bearing versus non-structural applications
This is where my supplier role has clear boundaries. I can explain general specification differences, but load calculations for structural fastening require qualified professional evaluation.
Non-structural (fixture mounting):
Most hardware retail customers need concrete nails for these applications—attaching lightweight objects to concrete or masonry surfaces without engineering load requirements. Selection focuses on adequate embedment depth and compatibility with installation tools.
Load-bearing (structural fastening):
Attaching wooden structural elements to concrete, mounting heavy machinery or equipment, and any fastening where failure creates safety hazards—these applications need professional specification. I can provide product data sheets with published holding power values, but site-specific decisions require engineering assessment of:
- Actual concrete strength and substrate condition
- Combined shear and tension loads
- Safety factors and building code compliance
- Installation quality control requirements
When customers inquire about structural applications, I provide our technical specifications but recommend consulting local contractors or engineers familiar with regional building practices and codes. That’s not avoiding the question—it’s recognizing where supplier knowledge ends and professional design authority begins.
What are the most common concrete nail failures and how to prevent them?
I spend significant time resolving complaints that aren’t product defects but application failures. These patterns repeat across different markets and customer types.
The three most frequent failure modes are nail bending during installation (wrong diameter for material hardness), pull-out under load (insufficient embedment depth), and substrate cracking (excessive installation force or wrong position selection).
Nail bending or tip deformation
Cause: Nail diameter too small for material hardness, or attempting hammer installation in concrete requiring pre-drilling.
Prevention: Match diameter to actual substrate—order 3.8-4.5mm nails for aged concrete, always pre-drill concrete exceeding 30MPa strength, and verify material type before hammer installation (many customers misidentify hard brick as "concrete").
Customer scenario: A distributor in Nigeria ordered 3.0mm concrete nails for general construction sales, then received complaints from multiple buyers that nails bent during hammering. Investigation revealed customers were installing into dense, aged concrete walls. Solution was reordering 4.0mm nails with recommendation to pre-drill hard substrates.
Fastening pull-out or loosening
Cause: Inadequate embedment depth, oversized pre-drilled holes, or material incompatibility.
Prevention: Calculate required length properly (material thickness + 25mm minimum embedment), drill pilot holes 0.5-1mm smaller than nail shank diameter, confirm material type is compatible with friction-grip fastening.
Customer scenario: Middle Eastern contractor ordered 40mm nails for attaching 25mm wooden battens, achieving only 15mm concrete embedment. Under load, battens pulled away. Correct specification was 60mm length for adequate embedment.
Concrete or masonry cracking
Cause: Installing too close to edges or corners, excessive striking force, or using nails in brittle materials.
Prevention: Maintain minimum 50mm distance from edges and 100mm from corners11, use controlled hammer strikes rather than maximum force, avoid installation in pre-stressed or cracked areas.
Customer scenario: Retail buyer complained about concrete blocks cracking during nail installation. Inspection revealed they were nailing within 30mm of block edges for shelf bracket mounting. Relocation to block centers solved the problem.
These aren’t defects—they’re specification or technique mismatches that looked fine during ordering but failed under actual site conditions.
How does nail quality affect installation success?
-
"Curing Concrete – Normal, Hot and Cold Weather", https://www.engr.psu.edu/ce/courses/ce584/concrete/library/construction/curing/curing.html. Concrete continues to gain compressive strength during curing, with most mixes reaching approximately 70% of design strength within 28 days and continuing to harden over subsequent months, which increases resistance to mechanical penetration. Evidence role: mechanism; source type: research. Supports: how concrete hardness increases during curing and affects penetration resistance. Scope note: This describes general concrete hardening rather than specific nail penetration testing ↩
-
"power driven fastening for steel connections", https://fsel.engr.utexas.edu/pdfs/94-1.pdf. Masonry and framing hammers typically range from 450g to 900g, with heavier weights providing greater striking force for driving fasteners into hard materials while requiring more control to prevent material damage. Evidence role: general_support; source type: education. Supports: typical hammer weights used for masonry and concrete fastening applications. Scope note: This describes general hammer specifications rather than optimal weights specifically for concrete nail installation ↩
-
"Withdrawal strength of ring-shank nails embedded in southern …", https://research.fs.usda.gov/treesearch/25675. Fasteners with longitudinal grooves or flutes increase surface area and create mechanical interlock with surrounding material, enhancing withdrawal resistance through both increased friction and physical keying into the substrate. Evidence role: mechanism; source type: research. Supports: how surface texture and geometry on fasteners increase friction and mechanical interlock. ↩
-
"Concrete Compressive Strength – an overview", https://www.sciencedirect.com/topics/engineering/concrete-compressive-strength. Concrete with compressive strength of 30-40 MPa is classified as medium to high strength in construction standards, commonly used for structural applications where durability and load-bearing capacity are important. Evidence role: general_support; source type: education. Supports: typical concrete strength classifications and what constitutes high-strength concrete. Scope note: This provides strength classification context but does not specifically address nail penetration thresholds ↩
-
"Handheld and Stand-Mounted Drills", https://www.osha.gov/sites/default/files/publications/OSHA_FS-3630.pdf. Masonry anchor installation typically requires drilling holes slightly deeper than the fastener length to accommodate drilling debris and prevent the fastener from bottoming out before achieving proper embedment, with clearance depths commonly ranging from 3-6mm. Evidence role: general_support; source type: education. Supports: standard practices for drilling clearance depth in masonry applications. ↩
-
"Soil Nail Wall – Reference Manual", https://www.fhwa.dot.gov/engineering/geotech/pubs/nhi14007.pdf. Mechanical fasteners in concrete generally require embedment depths of at least 25-30mm to develop adequate pullout resistance, with actual requirements varying based on fastener type, concrete strength, and load conditions. Evidence role: general_support; source type: education. Supports: typical minimum embedment depths for mechanical fasteners in concrete. Scope note: This reflects general fastening practice rather than specific testing data for concrete nails ↩
-
"ACI Standards for Concrete Proportions, Qualification Testing …", https://docs.lib.purdue.edu/cgi/viewcontent.cgi?article=1769&context=icdcs. Concrete in the 20-35 MPa range is commonly specified for general construction applications including residential foundations, slabs, and non-structural elements, representing normal-strength concrete in most building codes. Evidence role: definition; source type: education. Supports: standard concrete strength classifications used in construction. ↩
-
"High-Strength Concrete", https://www.engr.psu.edu/ce/courses/ce584/concrete/library/concreteprop/highstrengthconcrete/highstrength.html. Concrete with compressive strength exceeding 40 MPa is generally classified as high-strength concrete, used in applications requiring enhanced load-bearing capacity, durability, or reduced structural dimensions such as high-rise buildings and bridge construction. Evidence role: definition; source type: education. Supports: the classification threshold for high-strength concrete. ↩
-
"Galvanic corrosion", https://en.wikipedia.org/wiki/Galvanic_corrosion. Galvanization protects steel through both barrier protection and sacrificial corrosion, where the zinc coating prevents moisture contact with the underlying steel and preferentially corrodes when the coating is damaged, protecting the base metal. Evidence role: mechanism; source type: encyclopedia. Supports: how zinc coating protects steel from corrosion. ↩
-
"Atmospheric Corrosion Behavior of Carbon Steel and …", https://www.academia.edu/60759322/Atmospheric_Corrosion_Behavior_of_Carbon_Steel_and_Galvanized_Steel_after_Exposure_in_Eretan_and_Ciwaringin_West_Java_Province_Indonesia. Unprotected carbon steel exposed to outdoor atmospheric conditions typically develops visible rust within months, with corrosion rates varying from 20-100 micrometers per year depending on humidity, precipitation, and pollutant exposure, leading to significant material loss and staining within 1-2 years. Evidence role: general_support; source type: research. Supports: typical corrosion rates for unprotected steel in atmospheric conditions. Scope note: This describes general atmospheric corrosion rather than specific fastener performance in construction applications ↩
-
"Minimum Edge Distance Requirement – chemical anchors …", https://www.hilti.com/engineering/question/minimum-edge-distance-requirement/vacht6. Concrete anchor installation standards typically specify minimum edge distances ranging from 50-150mm depending on anchor type and diameter, with greater distances required near corners to prevent splitting forces from exceeding the concrete’s tensile strength. Evidence role: general_support; source type: education. Supports: typical minimum edge distance requirements for concrete fasteners. Scope note: This reflects general anchoring principles rather than specific requirements for driven concrete nails ↩