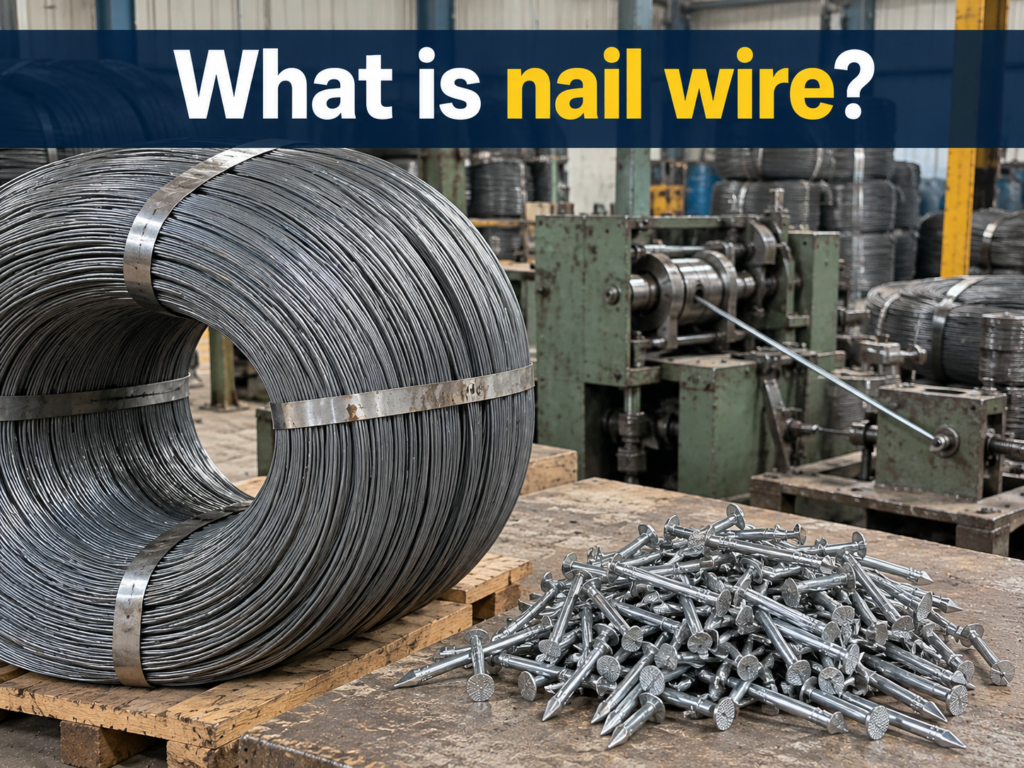

Concrete nail installation seems straightforward — grab a hammer and drive it in. But if you’ve ever watched a nail bend on impact, crack the substrate, or pull out under load, you know the reality is different. The gap between "simple in theory" and "reliable in practice" costs time, money, and sometimes safety.
Installing concrete nails correctly requires matching the right nail type, length, and diameter to your specific concrete substrate, then driving it with proper technique — either by hand with a heavy ball-peen hammer or with a powder-actuated tool. But installation success actually starts long before you swing: it begins with selecting the correct nail for the job.
That answer might surprise you. Most people searching for "how to install concrete nails" expect a five-step tutorial. And I will give you that. But I’ve spent years discussing concrete nail applications with hardware wholesalers and contractors across Africa, the Middle East, and Southeast Asia. The single biggest cause of installation failure I see isn’t bad technique — it’s the wrong nail being used in the first place. Let me walk you through the full picture.
Why does concrete nail selection matter more than technique?
You might think installation is purely about skill. But I’ve seen experienced masons struggle with perfectly good nails — simply because the nail wasn’t designed for that particular substrate. A mismatch between nail and concrete type creates problems no amount of hammering technique can fix.
The right concrete nail selection accounts for substrate hardness, required holding power, and the load the fastening must support. Choosing the wrong nail diameter, length, or steel grade turns an easy drive into a cracked wall, a bent nail, or a fastening that loosens within weeks.
How concrete type affects your nail choice
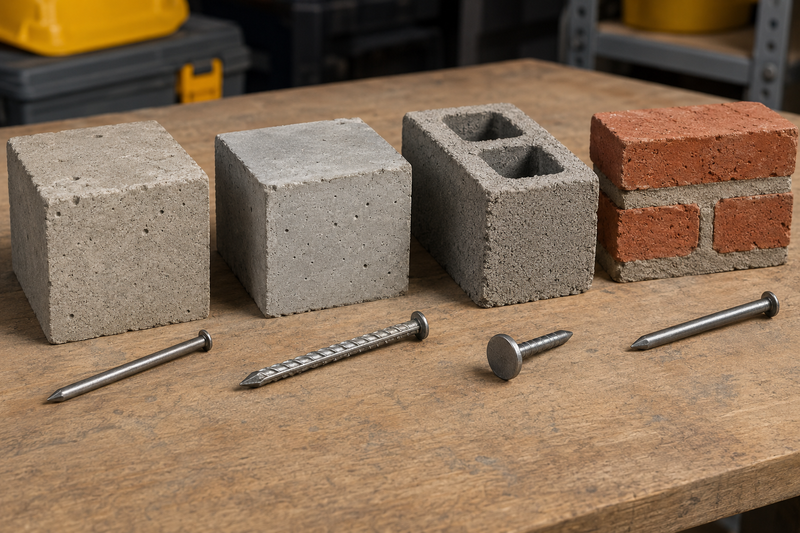
Not all concrete is the same. The mix design, age, and aggregate composition all influence hardness. Here’s a breakdown of common substrates I discuss with customers:
| Substrate Type | Relative Hardness | Recommended Nail | Key Consideration |
|---|---|---|---|
| Fresh concrete (< 7 days) | Soft | Standard concrete nail, thinner gauge | Risk of over-penetration; wait for curing |
| Standard cured concrete | Medium-Hard | High-carbon steel concrete nail | Most common application |
| Precast / high-strength concrete | Very Hard | Heat-treated fluted concrete nail | Higher breakage risk; consider pilot holes |
| Concrete block (hollow) | Variable | Shorter concrete nail with wider head | Avoid driving into hollow sections |
| Mortar joints (between blocks) | Softer than block | Standard concrete nail | Often the preferred fastening point |
When a wholesale buyer in Dar es Salaam orders concrete nails for the local market, the end users might be fixing timber formwork to cured concrete, attaching conduit clips to block walls, or securing roofing battens to concrete ring beams. Each of these applications demands a different nail specification — even though they all fall under "concrete nails."
The role of nail hardness and carbon content
Concrete nails are not ordinary wire nails with a different name. They are made from high-carbon steel (typically 0.5–0.7% carbon content), then heat-treated to achieve the hardness needed to penetrate masite or concrete without bending. This is the critical difference.
A standard mild steel nail — like a common wire nail — will bend or mushroom on contact with cured concrete. A properly manufactured concrete nail will:
- Resist bending during high-impact driving
- Maintain its point geometry through dense aggregate
- Hold its position once embedded, thanks to the friction between hardened steel and concrete
However, this hardness comes with a trade-off: brittleness. An over-hardened concrete nail can snap under lateral stress or shatter if struck at an angle. This is why quality control during manufacturing is not just a nice-to-have — it directly affects whether your customers come back with complaints.
I always tell wholesale partners: when you’re comparing prices between suppliers, you’re not just comparing steel and shipping. You’re comparing the consistency of that heat treatment process. A nail that’s 10% cheaper but fails 20% of the time is no bargain.
What tools do you need to install concrete nails?
Most people assume you just need a hammer. Technically, yes. But using the wrong hammer — or the wrong striking technique — is the second most common cause of installation problems I hear about from the field.
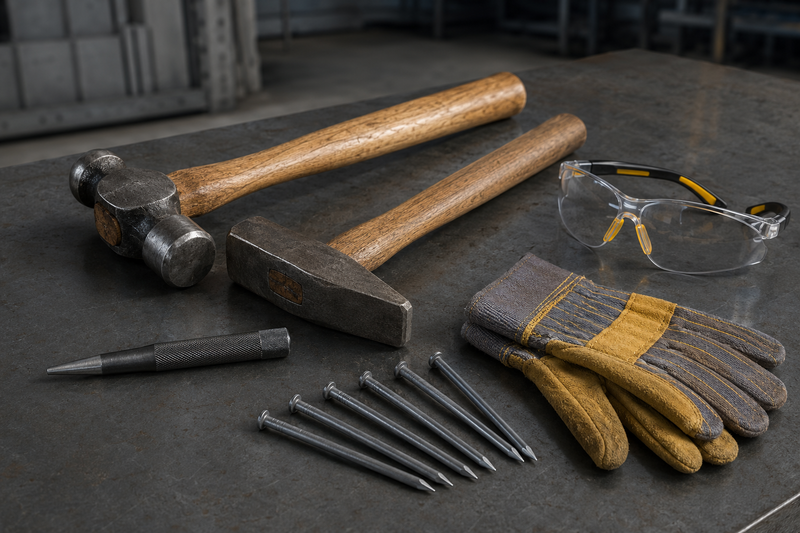
For manual concrete nail installation, you need a ball-peen hammer (at least 24 oz / 680g) or a dedicated masonry hammer. For high-volume or structural applications, a powder-actuated tool (PAT) is the professional choice. Safety equipment — especially eye protection — is non-negotiable.
Manual installation tools
Here’s what I recommend for hand-driven concrete nails:
- Ball-peen hammer (24–32 oz): The flat face delivers concentrated force. Avoid claw hammers — the face is too small and the handle too light for sustained concrete nailing.
- Masonry hammer (2–3 lb): Better for larger-diameter nails (3.0mm+) and harder substrates.
- Nail set / punch: Useful for driving the nail the final few millimeters flush without risking a mis-strike.
- Safety glasses: Mandatory. Concrete chips and steel fragments fly during driving. I have heard too many stories about eye injuries from skipping this step.
- Work gloves: Protect against vibration and mis-strikes.
Powder-actuated tools (PATs)
For contractors installing hundreds of fastenings per day — think electrical conduit clips, ceiling furring channels, or metal brackets to concrete — a powder-actuated tool dramatically increases speed and consistency. These tools use a small gunpowder charge to drive a specially designed pin into concrete.
Important note: PAT fasteners are a different product category from standard concrete nails. They require specific pin geometries and are not interchangeable. If your wholesale customers are asking about PAT pins, that’s a separate sourcing conversation.
Choosing the right tool for the job
| Application | Recommended Tool | Nail Diameter Range | Notes |
|---|---|---|---|
| Light fixing to block walls | Ball-peen hammer | 2.0–2.5mm | Conduit clips, small brackets |
| Medium fixing to cured concrete | Masonry hammer | 2.5–3.5mm | Timber battens, cable trays |
| Heavy-duty / structural | Powder-actuated tool | PAT-specific pins | Steel brackets, seismic clips |
| Overhead (ceiling) installations | Powder-actuated tool strongly preferred | PAT-specific pins | Gravity makes hand-driving difficult and unsafe |
How do you drive a concrete nail step by step?
This is the part most readers came for. But now you understand why I covered selection and tools first — because these steps only work when you’ve already made the right choices upstream.
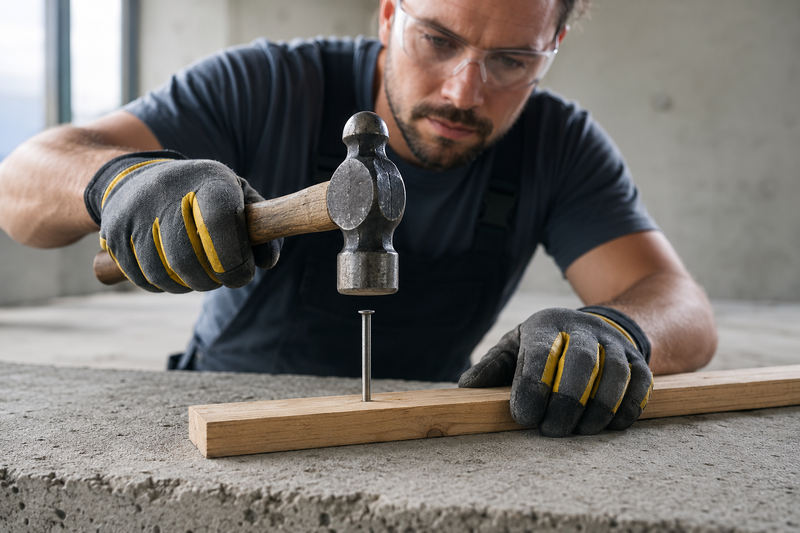
To drive a concrete nail by hand: mark your position, hold the nail at 90° to the surface, start with light taps to set the nail, then deliver firm full-swing strikes until the nail is flush or at the desired depth. Never strike at an angle, and always wear eye protection.
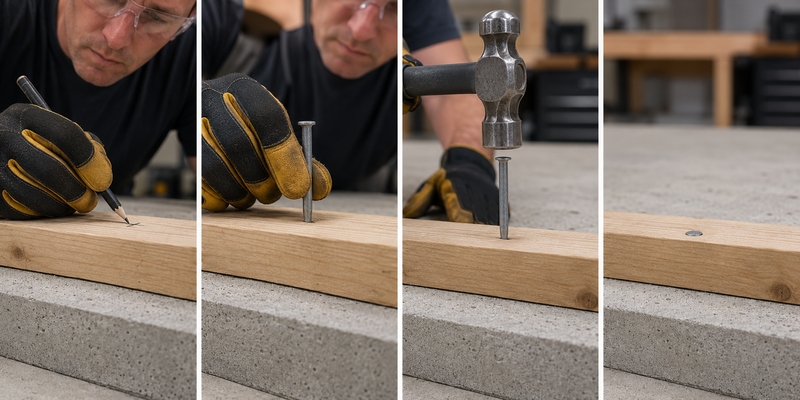
Step-by-step manual installation
-
Mark the fastening point. Use a pencil or marker. Avoid locations near edges — concrete is weakest within 50mm of an edge and prone to spalling.
-
Position the material to be fastened. If you’re attaching a timber batten or bracket, hold it in place or temporarily secure it before nailing.
-
Hold the nail perpendicular to the surface. 90 degrees. This is critical. Even a 10° tilt dramatically increases the chance of bending or deflection.
-
Start with 3–4 light taps. This "sets" the nail point into the concrete surface and creates a small crater that prevents walking (the nail sliding sideways). Use your fingers near the nail head — carefully — or use a nail holder/magnetic guide.
-
Move your holding hand away. Once the nail stands on its own (typically 5–10mm embedded), remove your fingers from the danger zone.
-
Drive with firm, square strikes. Hit the nail head dead center. Each strike should be confident and controlled — not wild. Let the hammer’s weight do the work.
-
Stop at the right depth. For most applications, the nail head should be flush with the material being fastened, or 1–2mm proud (above surface). Over-driving crushes the material and reduces holding power.
Common mistakes I see reported from the field
- Using a claw hammer: Too light, wrong face geometry. The nail bends, the user blames the nail.
- Driving at an angle: The nail deflects off aggregate particles and exits sideways. This is dangerous.
- Choosing nails that are too long: A 50mm nail in a 75mm block wall may punch through the other side. I’ve had customers describe situations where nails protruded into interior finished walls.
- Not pre-drilling in very hard concrete: For substrates above 40 MPa compressive strength, a small pilot hole (slightly narrower than the nail shank) dramatically improves success rates.
- Ignoring temperature: In very cold conditions, both the concrete and the nail steel become more brittle. Installation in sub-zero conditions requires extra caution.
Pre-drilling: when is it necessary?
Pre-drilling is not always required for concrete nails — that’s one of their primary advantages over screws and anchors. But there are situations where it helps:
- High-strength precast panels (> 40 MPa)
- Aged concrete (decades old, very dense)
- Thin-section concrete where cracking is a risk
- Locations near edges or corners
Use a masonry drill bit 1–2mm smaller than the nail diameter. Drill to approximately 75% of the intended nail penetration depth.
What nail length and diameter should you choose for concrete?
This is the question I get asked most frequently by wholesale buyers. And it’s the one with the most "it depends" in the answer. But I can give you clear frameworks.
As a general rule, the nail should penetrate the concrete substrate by at least 20–25mm beyond the material being fastened. For diameter, 2.5mm is the most versatile size for general construction in the markets I serve, but heavier loads and harder substrates may demand 3.0mm or 3.5mm nails.
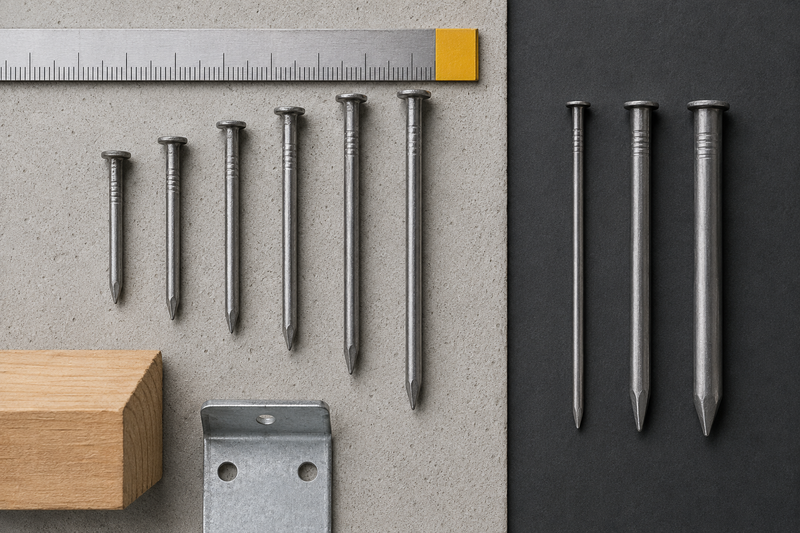
Length selection guide
The formula is simple:
Minimum nail length = thickness of material being fastened + 20–25mm penetration into concrete
For example:
- Fastening a 20mm timber batten → minimum 40–45mm nail
- Fastening a 3mm steel bracket → minimum 25–30mm nail
- Fastening a 50mm timber frame → minimum 70–75mm nail
Here’s a practical reference table based on common sizes I supply:
| Nail Length | Material Thickness Range | Typical Application |
|---|---|---|
| 25mm (1") | 1–5mm | Thin metal clips, conduit straps |
| 30mm (1.25") | 5–10mm | Small brackets, thin trim |
| 40mm (1.5") | 10–20mm | Standard battens, light frames |
| 50mm (2") | 20–30mm | Timber battens, thicker brackets |
| 60mm (2.5") | 30–40mm | Heavier timber members |
| 75mm (3") | 40–50mm | Structural timber connections |
Diameter and its practical implications
Larger diameter means:
- Higher shear resistance (resists sideways forces)
- More driving force required (harder to install by hand)
- Greater risk of concrete cracking (especially in thin sections or near edges)
Smaller diameter means:
- Easier to drive manually
- Lower holding power
- Less likely to crack the substrate
Most of my wholesale partners stock 2.5mm × 40mm and 3.0mm × 50mm as their bread-and-butter sizes. These cover roughly 70% of general construction needs in markets like East Africa and the Middle East.
How do you avoid cracking concrete during nail installation?
Cracking is the most common and most frustrating installation problem. Once concrete cracks, the nail’s holding power drops to nearly zero — and the substrate is permanently damaged.
To prevent cracking when driving concrete nails, maintain minimum edge distances (at least 50mm from any edge), avoid clustering nails too closely together (minimum 40mm spacing), and consider pre-drilling in thin or high-strength concrete. Choosing the correct nail diameter for the substrate thickness is equally critical.
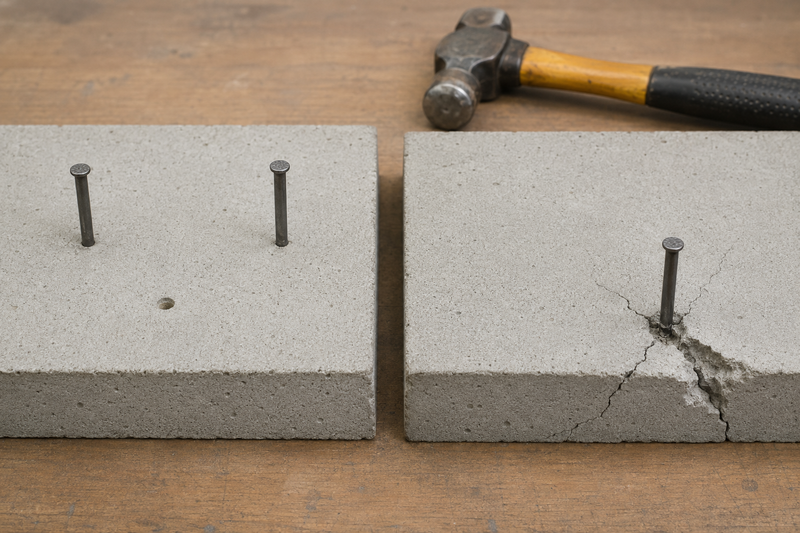
Why concrete cracks during nailing
When a concrete nail is driven in, it doesn’t cut through the material the way a drill bit does. It displaces the concrete, generating outward pressure. This pressure creates tensile stress in the surrounding concrete. Since concrete is strong in compression but weak in tension (roughly 10% of its compressive strength), this outward force can cause cracks to propagate, especially:
- Near edges where there’s no surrounding concrete to resist the outward force
- Between closely spaced nails where stress fields overlap
- In thin concrete sections where the nail tip approaches the opposite face
- In old or poorly mixed concrete where internal micro-cracks already exist
Practical prevention strategies
-
Respect edge distances. Keep nails at least 50mm (2 inches) from any concrete edge. For block walls, this means avoiding the thin shell of hollow blocks.
-
Space nails adequately. A minimum of 40mm (1.5 inches) between nails prevents overlapping stress zones.
-
Match diameter to substrate thickness. A 3.5mm nail in a 50mm block shell is asking for trouble. Use 2.5mm or smaller in thin sections.
-
Pre-drill when in doubt. A pilot hole significantly reduces displacement forces.
-
Avoid driving into aggregate. If you feel the nail hit a stone (sudden resistance), it’s sometimes better to remove and reposition slightly rather than force it through. Forcing the nail against large aggregate pieces creates unpredictable stress patterns.
-
Consider fluted or grooved nails. These designs reduce the volume of displaced concrete compared to smooth-shank nails of the same holding power.
Frequently Asked Questions
Can concrete nails be used in brick walls?
Yes. Concrete nails work well in solid clay bricks and cement bricks. However, they perform poorly in soft or hollow bricks where the material crumbles on impact. For perforated bricks, aim for the solid webs rather than the hollow cores. Always test a sample nail first.
Do concrete nails rust?
Standard high-carbon steel concrete nails will rust in exposed or humid conditions. For exterior applications or coastal environments, request galvanized concrete nails or nails with anti-corrosion coatings. Specify your end-use environment when ordering so your supplier can recommend the right finish.
What is the difference between concrete nails and masonry nails?
In common usage, the terms are interchangeable. Both refer to hardened steel nails designed for driving into concrete, brick, or block. Some markets use "masonry nail" for cut-steel nails with a square cross-section, while "concrete nail" more often describes round-shank, heat-treated nails. Clarify specifications when ordering.
Can you remove concrete nails once driven?
With difficulty. Because concrete nails rely on friction and compression for holding power, removal typically requires a pry bar or claw tool and often damages the surrounding concrete. Plan nail placement carefully. If you anticipate needing to remove a fastening, consider concrete screws instead.
What is the minimum order quantity for concrete nails from a factory?
From our factory, the minimum order is typically 5 tons or 200 cartons. We support trial orders so you can test product quality in your local market before committing to larger volumes. Custom packaging, branding, and OEM specifications are available.
Conclusion
Installing concrete nails successfully is about much more than swinging a hammer. It starts with selecting the right concrete nail — the correct length, diameter, steel grade, and surface treatment for your specific substrate and application. It continues with using proper tools and technique. And it ends with understanding the limitations of the product so you can advise your downstream customers confidently.
If you’re a hardware wholesaler sourcing concrete nails for markets in the Middle East, Africa, Southeast Asia, or South America, I’d encourage you to think of your supplier as a partner in this process — not just a price list. The right